





A question many patients ask after spinal surgery is: When can I start moving again? In many cases, the answer is sooner than expected. Gentle activities such as getting out of bed, taking short walks, and practicing controlled breathing may begin early, while more demanding core exercises are introduced gradually as healing progresses.
Dr. Scott Wang, a rehabilitation physician, told The Epoch Times that current rehabilitation practices encourage patients to get out of bed and begin moving as early as their condition allows. Prolonged bed rest can weaken muscles and make it harder to regain mobility, while appropriately timed movement supports the recovery process.
However, moving early does not mean immediately starting an intense workout. The type and timing of exercise depend on the procedure performed, the patient’s condition, and the surgeon’s instructions. Early rehabilitation may begin with short walks, diaphragmatic breathing, and gentle abdominal contractions. More dynamic core training can follow after the patient has received medical clearance.
Spinal health is influenced by more than posture or mechanical strain. Aging, genetics, injury, metabolic health, and lifestyle can all affect the structures supporting the spine.
Regular movement can help on both fronts. Exercise strengthens the muscles that stabilize the spine while supporting weight management, cardiovascular health, and metabolic function.
Related Stories

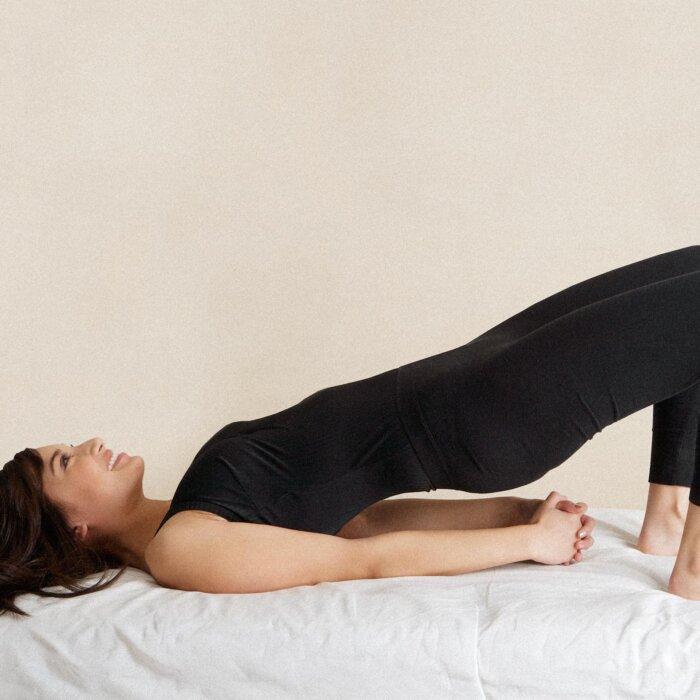
Once a physician or physical therapist has determined that more active core training is appropriate, the following 10-minute routine offers a gradual way to strengthen the muscles surrounding the spine.
Note: Recovery timelines vary according to the procedure and the individual. If you have undergone spinal surgery, recently sustained an injury, or have persistent back or neck pain, obtain clearance from your surgeon or physical therapist before attempting this routine. Stop if a movement causes sharp or increasing pain, numbness, tingling, weakness, or pain radiating into an arm or leg.
10-Minute Core Routine for Spinal Stability
The core includes the muscles of the abdomen, back, pelvis, and hips. Together, these muscles help stabilize the trunk and reduce excessive strain on the spine.
Follow the video at a comfortable pace. Beginners may use a smaller range of motion, perform fewer repetitions, or skip movements that they cannot complete while maintaining control. Keep breathing throughout each exercise, and avoid pulling on the head or neck.
1. Bent-Knee Crunch
Step 1: Lie flat on your back on a flat surface with your knees bent and your feet flat on the floor. Place your hands beside your ears.
Step 2: As you exhale, engage your core and lift your head and shoulders off the floor while simultaneously bringing one knee toward your chest. As you inhale, slowly lower your head, shoulders, and raised leg back to the starting position. Alternate sides.
2. Straight-Leg Crunch–Right
Step 1: Lie flat on a flat surface with your left knee bent and your left foot on the floor. Extend your right leg straight.
Step 2: As you exhale, engage your core and lift your head and shoulders off the floor while simultaneously raising your right leg to approximately 90 degrees. As you inhale, slowly lower your head, shoulders, and right leg back to the starting position. Repeat several times.
3. Straight-Leg Crunch–Left
Step 1: Lie flat on a flat surface with your right knee bent and your right foot on the floor. Extend your left leg straight.
Step 2: As you exhale, engage your core and lift your head and shoulders off the floor while simultaneously raising your left leg to approximately 90 degrees. As you inhale, slowly lower your head, shoulders, and left leg back to the starting position. Repeat several times.
4. Bicycle Crunch
Step 1: Lie flat on a flat surface with your hands lightly placed behind your ears. Lift both legs, with your knees bent at 90 degrees. Engage your core and keep your lower back pressed against the floor.
Step 2: As you exhale, curl your upper body up and rotate to the left, bringing your right elbow toward your left knee while simultaneously extending your right leg forward without letting it touch the floor. Inhale as you return to the starting position.
Step 3: As you exhale, curl your upper body up and rotate to the right, bringing your left elbow toward your right knee while simultaneously extending your left leg forward without letting it touch the floor. Inhale as you return to the starting position. Alternate between Steps 2 and 3.
5. Upper Crunch
Step 1: Lie flat on a flat surface with both knees bent and your feet flat on the floor. Extend your arms straight forward.
Step 2: As you exhale, engage your core and use your upper abdominal muscles to lift your head and shoulders off the floor. As you inhale, slowly lower your head and shoulders back down. Repeat several times.
6. Reverse Crunch
Step 1: Lie flat on a flat surface with your palms facing down beside your body. Lift both legs so that your thighs are perpendicular to the floor.
Step 2: As you exhale, use your abdominal muscles to curl your hips off the floor, bringing your knees as close to your chest as possible. As you inhale, slowly return to the starting position. Repeat several times.
7. Leg Raise Crunch–Right
Step 1: Lie flat on a flat surface with your right leg extended and raised to approximately 90 degrees, and your left leg extended flat on the floor. Extend both arms overhead.
Step 2: As you exhale, engage your core and use your upper abdominals to lift your head and shoulders off the floor while raising both hands to touch your right foot. As you inhale, slowly lower your head, shoulders, and arms back to the starting position. Repeat several times.
8. Leg Raise Crunch–Left
Step 1: Lie flat on a flat surface with your left leg extended and raised to approximately 90 degrees, and your right leg extended flat on the floor. Extend both arms overhead.
Step 2: As you exhale, engage your core and use your upper abdominals to lift your head and shoulders off the floor while raising both hands to touch your left foot. As you inhale, slowly lower your head, shoulders, and arms back to the starting position. Repeat several times.
9. Quadruped Arm and Leg Raise–Right
Step 1: Start on your hands and knees. Raise your right arm and left leg, supporting your body with your left hand and right knee.
Step 2: As you exhale, simultaneously lift your right arm forward and your left leg backward. As you inhale, bring your right arm and left leg back to the starting position. Repeat several times. Keep your core engaged throughout and do not let your left foot touch the floor.
10. Quadruped Arm and Leg Raise–Left
Step 1: Start on your hands and knees. Raise your left arm and right leg, supporting your body with your right hand and left knee.
Step 2: As you exhale, simultaneously lift your left arm forward and your right leg backward. As you inhale, bring your left arm and right leg back to the starting position. Repeat several times. Keep your core engaged throughout, and do not let your right foot touch the floor.
Exercise is an important part of rebuilding strength after spinal surgery, but recovery is not a race. The safest approach is to begin with gentle movement, progress according to medical guidance, and focus on controlled technique rather than intensity. Even a short routine can be valuable when it is performed consistently and at the appropriate stage of recovery.